-
accueil Parc industriel de Dongguan Houjie
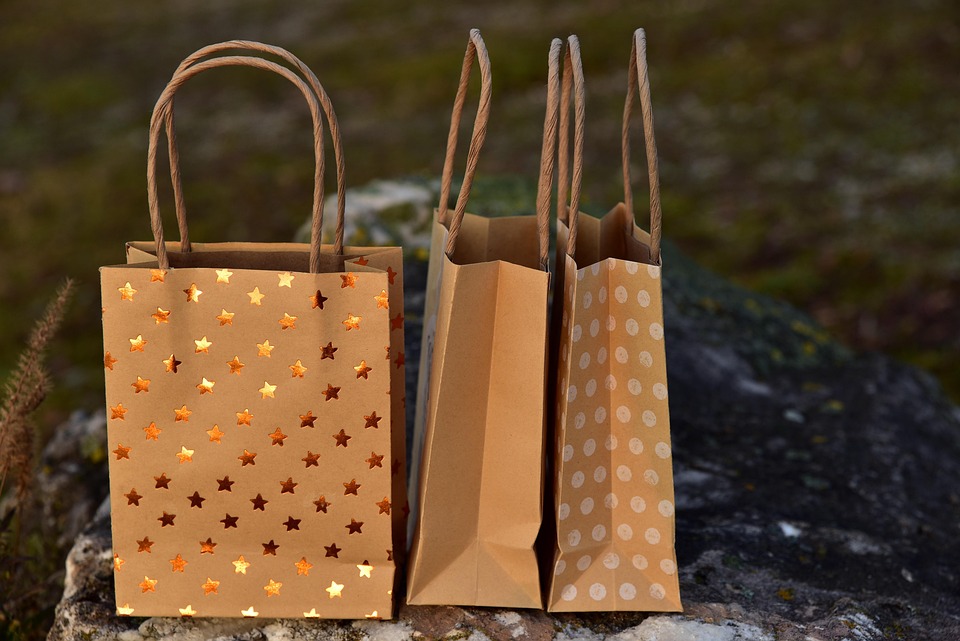
how to make a bag out of wrapping paper
[ad_1]
Wrap It Up! How to Make a Chic Gift Bag from Wrapping Paper (No Store Run Required!)
Running low on gift bags? Or perhaps you’re just feeling a little extra crafty and want to add a personal touch to your present presentation? Look no further than that roll of wrapping paper hiding in your closet! Believe it or not, transforming a sheet of festive wrapping paper into a stylish and functional gift bag is surprisingly easy. Not only is it a budget-friendly solution, but it’s also a fantastic way to utilize leftover paper and add a unique, handmade flair to your gifts.
Forget those last-minute dashes to the store – with just a few simple folds and a bit of tape, you can whip up a charming wrapping paper bag in minutes. Ready to ditch the generic and embrace the personalized? Let’s get crafty!
What You’ll Need:
- Wrapping Paper: Choose a piece large enough to accommodate your gift. Thicker paper will be more durable, but most types will work.
- Scissors: For clean and precise cuts.
- Tape: Double-sided tape is ideal for a seamless look, but regular clear tape will do the trick.
- Ruler (Optional): Helpful for ensuring straight folds, especially for beginners.
- Ribbon or String (Optional): To create handles and add an extra decorative touch.
- Embellishments (Optional): Stickers, tags, or decorative tape to personalize your bag further.
Let’s Bag It! Step-by-Step Guide:
Prepare Your Paper: Lay your wrapping paper flat on a clean, hard surface with the pattern facing down.
Fold and Create the Bag Sides:
- Long Edge Fold: Bring one long edge of the paper towards the center and fold it over, creating a crease. Repeat with the opposite long edge, overlapping them slightly in the middle. Aim for about a 1-inch overlap. This overlap will form the back seam of your bag.
Secure the Back Seam: Use tape to secure the overlapped edges along the entire length of the seam. Double-sided tape placed between the overlapping layers will create a cleaner, more professional look. If using regular tape, apply it to the inside of the bag seam for a less visible finish.
Form the Base – Top and Bottom Folds:
- Bottom Fold: Fold up the bottom of the paper, creating a flap that is approximately 1/3 of the height of your desired bag. Crease this fold firmly.
Create the Gusset (Side Folds for Depth):
- Open the Bottom Fold: Carefully open the bottom folded flap you just made. You’ll see the crease you created.
- Triangle Folds: With the bottom flap open, gently push the sides of the flap inwards and downwards towards the center crease. This will naturally create two triangular folds on each side of the bottom flap. Think of folding a paper airplane’s nose upwards.
- Flatten the Base: Fold the top and bottom edges of the bottom flap inwards along the creases you’ve just made, flattening the base of the bag. These triangles are what give your bag its depth.
Secure the Base:
- Tape the Base Flaps: Use tape to securely fasten the top and bottom flaps of the base to the side walls of the bag. Apply tape to both the inside and outside of the base for extra strength. Make sure all flaps are firmly taped down to create a stable bottom.
Open and Shape Your Bag: Gently open up the top of the bag, using your fingers to shape the sides and base. Your wrapping paper gift bag is now taking shape!
Reinforce the Top Edge (Optional but Recommended):
- Fold Over the Top Edge: Fold over the top edge of the bag inwards about an inch or two, creating a clean finished edge and adding a bit of reinforcement.
- Tape or Glue (Optional): You can tape or glue this folded edge in place for a neater look and added strength, especially if using thinner wrapping paper.
Add Handles (Optional):
- Punch Holes (Optional): If you want handles, carefully punch holes on opposite sides of the top edge of the bag.
- Thread Ribbon or String: Thread ribbon, string, or even strips of leftover wrapping paper through the holes to create handles. Knot the ends on the inside of the bag to secure them.
- Personalize and Decorate! This is where you can really let your creativity shine! Add stickers, tie on a gift tag, use decorative tape along the seams, or even draw designs on the bag itself. Match your decorations to the wrapping paper pattern and the occasion for a perfectly themed gift bag.
Tips and Tricks for Bag-Making Success:
- Practice Makes Perfect: Don’t be discouraged if your first attempt isn’t flawless. Practice on scrap paper first to get the hang of the folds.
- Crisp Creases are Key: Sharp, clean creases are essential for a well-formed bag. Use a bone folder or the edge of a ruler to help create crisp folds.
- Stronger Paper, Stronger Bag: Thicker wrapping paper will naturally create a more durable bag. Consider double-layering thinner paper for added strength if you have a heavier gift.
- Size Matters: Before you start folding, ensure your wrapping paper sheet is large enough to comfortably fit your gift. It’s always better to overestimate slightly.
- Get Creative with Handles: Don’t be limited to ribbon or string. Try using braided yarn, twine, or even strips of fabric for unique handles.
Beyond Gift Bags:
While perfect for presents, these wrapping paper bags can also be used for other purposes:
- Party Favor Bags: Create adorable treat bags for parties.
- Storage for Small Items: Use them to organize craft supplies, jewelry, or other small bits and bobs.
- Decorative Elements: Line shelves or drawers with these bags for a pop of color and pattern.
Making a wrapping paper bag is a delightful way to add a personal and eco-conscious touch to your gift-giving. It’s a simple yet satisfying craft that’s perfect for all ages and skill levels. So, next time you’re in need of a gift bag, skip the store run and unleash your inner paper artist! You’ll be surprised at how quickly you can transform something as simple as wrapping paper into a charming and functional bag. Happy crafting!
[ad_2]