-
首頁 東莞厚街工業園
how to make gift bag out of wrapping paper
[ad_1]
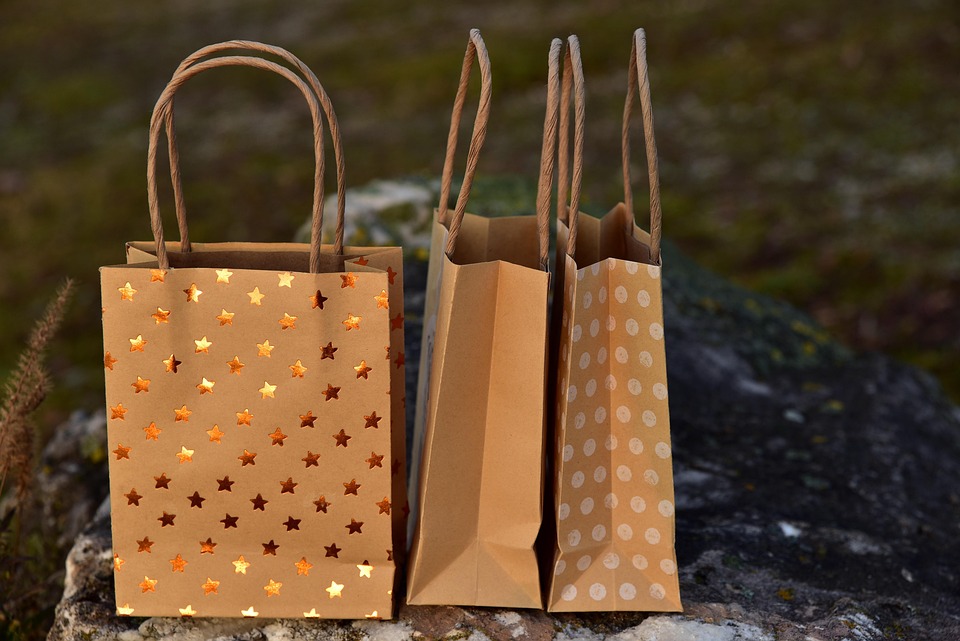
Wrap It Up! Transform Festive Wrapping Paper into Charming Gift Bags
In the spirit of giving, the presentation is just as important as the present itself! But before you reach for that store-bought gift bag, consider this: you can easily create beautiful, personalized gift bags right at home using the very wrapping paper you might have leftover after the holidays or a gift-giving occasion. It’s a fantastic way to be resourceful, add a handmade touch, and customize your gift presentation to match your thoughtfulness.
Forget the generic bags – let’s unlock the surprisingly simple secret to crafting charming gift bags directly from your favorite wrapping paper. No special skills are needed, just a few basic supplies and a dash of creativity. Ready to transform that stash of wrapping paper into something special? Let’s get started!
Why Make Your Own Gift Bags?
Before we dive into the how-to, let’s appreciate the “why.” Creating your own gift bags offers a delightful array of benefits:
- Eco-Friendly & Resourceful: Repurpose leftover wrapping paper and give it a second life, reducing waste and embracing sustainability.
- Cost-Effective: Skip the expense of buying pre-made gift bags, especially during peak gifting seasons. You likely already have the main material at home!
- Personalized Touch: Choose wrapping paper that perfectly complements the gift and the recipient’s style, making your present even more meaningful.
- Creative Outlet: Enjoy the simple satisfaction of crafting something beautiful with your own hands. It’s a relaxing and rewarding activity.
- Perfect Size Every Time: Customize the bag size to perfectly fit your gift, eliminating excess space or struggling to cram things in.
What You’ll Need:
- Wrapping Paper: Choose a piece large enough to accommodate your gift (more on sizing later). Thicker paper generally works best for sturdier bags.
- Scissors or Craft Knife: For clean, precise cuts.
- Tape: Double-sided tape is ideal for a cleaner finish, but regular tape will work too.
- Ruler or Straight Edge (Optional but Recommended): For straight lines and precise folds.
- Ribbon, String, or Handles (Optional): To add handles or decorative ties.
- Hole Punch (Optional): For creating holes for handles.
- Embellishments (Optional): Stickers, tags, stamps, or other decorations to personalize your bag further.
Step-by-Step Guide: Creating Your Wrapping Paper Gift Bag
Let’s break down the process into easy-to-follow steps:
1. Measure and Cut Your Wrapping Paper:
- Determine the size: Place your gift on the wrapping paper and visualize the bag size you need. A good rule of thumb is to leave enough paper on all sides to fold over and create the bag’s structure.
- Cut the paper: Use scissors or a craft knife and ruler to cut a rectangular piece of wrapping paper. For a standard small to medium-sized bag, a piece roughly 12 inches by 18 inches is a good starting point. You can adjust based on your gift size.
2. Fold the Sides:
- Fold in one long side: Place the wrapping paper pattern-side down on a flat surface. Fold one of the longer edges inward by about 1-2 inches (depending on the bag size you want). Crease the fold firmly.
- Fold the other long side: Repeat the same fold on the opposite long edge. The folds should overlap slightly in the center when brought together.
3. Tape the Sides Together:
- Overlap and secure: Bring the folded edges together so they overlap slightly. Use double-sided tape (or regular tape on the inside) to secure the overlapping edges, creating the main body of the bag – a tube shape. Ensure the tape runs the entire length of the overlap for a sturdy seam.
4. Create the Bottom:
- Fold the bottom edges: With the taped seam facing away from you, flatten the bottom of the tube and bring the two bottom corners together, creating a diamond or pointed shape at the base.
- Fold the points inward: Fold the top and bottom points of the diamond shape towards the center line. This will create a flat bottom for your bag.
- Tape the bottom flaps: Tape the bottom flaps securely together. Reinforce with extra tape if necessary, especially for heavier gifts.
5. Create the Top Edge & Handles (Optional):
- Fold over the top edge: Fold the top opening of the bag inwards by about an inch (or more, depending on your preference). This creates a neat, finished edge and adds strength. Crease the fold.
- Add Handles (Optional):
- Ribbon Handles: Punch two holes on opposite sides of the top folded edge. Thread ribbon or string through the holes on each side and tie knots on the inside of the bag to secure them as handles.
- Folded Paper Handles: Cut strips of sturdy wrapping paper or cardstock. Fold them in half lengthwise for extra strength. Tape or glue the ends of the strips to the inside of the bag at the top edges to create handles.
6. Embellish and Personalize!
- Decorate: Now for the fun part! Use stickers, stamps, ribbons, tags, or markers to decorate your gift bag and make it truly unique.
- Add a Gift Tag: Create a handmade gift tag from scrap paper or cardstock and tie it to the handle or top of the bag.
Tips for Success:
- Practice makes perfect: Don’t be afraid to try a practice bag with scrap paper first to get the hang of the folding and taping.
- Choose the right paper: Thicker wrapping paper or even lightweight cardstock will create a sturdier bag.
- Secure taping is key: Ensure your tape is strong and applied well, especially on the bottom seam, to prevent the bag from tearing.
- Consider bag size: Before cutting, visualize your gift inside the bag to ensure you cut the right size of wrapping paper.
- Get creative with handles: Experiment with different materials and techniques for handles – twine, fabric scraps, even twisted paper.
- Embrace imperfections: Handmade charm comes from slight imperfections. Don’t strive for absolute perfection – enjoy the process!
Beyond Basic Bags:
Once you’ve mastered the basic gift bag, you can explore variations:
- Pleated Sides: Create pleats on the sides before taping for a more decorative look.
- Folded Top Closure: Instead of folding straight down, experiment with angled or decorative top folds.
- Envelope-Style Bags: For smaller, flatter gifts, you can create simple envelope-style bags using a similar folding technique.
Making gift bags out of wrapping paper is a rewarding and creative way to elevate your gift-giving. It’s not just about saving money; it’s about adding a personal touch, being mindful of resources, and enjoying the simple pleasure of crafting something special. So, next time you have a gift to give, skip the store-bought bag and unleash your inner crafter! You’ll be surprised at how beautiful and personalized your gifts can be. Happy wrapping (and bag-making)!
[ad_2]